|
Academy Topics
Articles relating to Active Worlds
Help with Objects, Textures, Masks, Coronas, Movers, Avatars, Sequences and more.
Guides on how to do various things in Active Worlds
Graphics, ads and sounds for use.
Downloadable AWG's, Particles, Movers and Building Code
Resources (...)
SW City Network
|
Overview
A picture is worth a thousand words right? Screenshots are useful for many many things, and if you do a lot of building you'll most likely be taking a few. There's such a vast potential difference between good and bad screenshots, so let's go over some tips.
How-to
To take a screenshot in AW you can either use the built-in AW screenshot, or the windows screenshot.
- To use AW's, use the screenshot button in the toolbar, or go to options -> configure controls, and set a hotkey to the screenshot function. Then open the Aworld.ini file, located where AW was installed. Scroll down the [Screenshot] section and change max_image=1 to max_image=999, or any high value. This allows you to take more than 1 screenshot.
- To use the windows screenshot function, simply press the print screen button on your keyboard, next to the F12 key. Then open an image editor program and paste (ctrl+v).
Tips
- Because screenshots are done holding still, your framerate is out of the picture. So, most importantly, crank up that vis all the way to 200m. It doesn't matter if you get 0.7 frames per second, you can't tell through a screenshot.
- Position yourself in a way where you can't see the vis cut off point. If you can see beyond 200m, you'll notice everything gets chopped off and jagged. Not too pretty. Try to get in a position and angle where it's not noticeable.
- Use anti-aliasing (AA) and anisotropic filtering (AF). AA and AF are features of your graphics card, not AW. Anti-aliasing will remove jaggedness, especially noticeable if you have cables/wires strung around in the scene, and anisotropic filtering basically makes textures look better when viewing them from a sharp angle. How to enable these features depend on your card, and note it will enable it for all 3d applications as well, such as games.
Usually you can just right click on the desktop, click properties, then click the settings tab (the same place where you change the screen resolution). Then click the advanced button. Look around in there for AA and AF controls. If there's nothing there, then you either don't have the graphic card's software installed (note this is the software, not the drivers), or your card has its settings elsewhere.
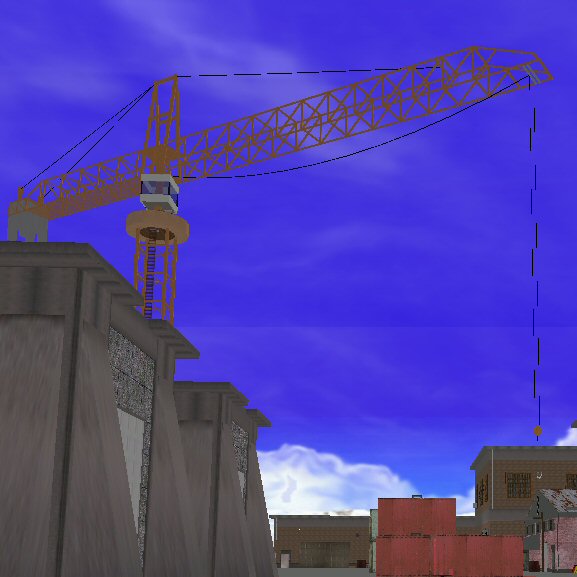
Without AA and AF
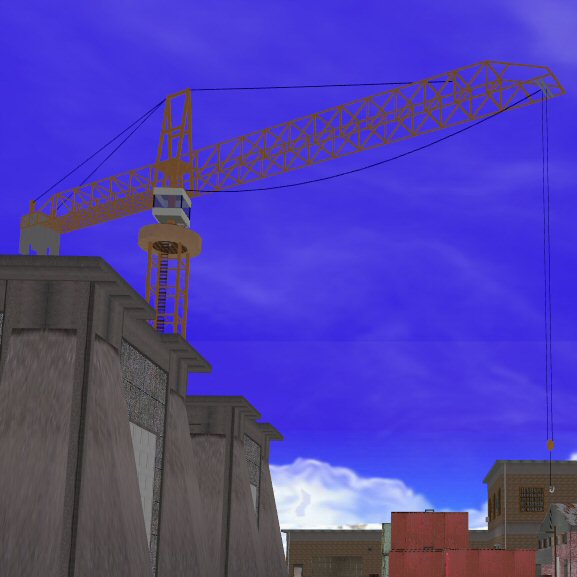
With AA and AF
- Use mip-mapping. AW's mip-mapping isn't a perfect graphical treatment, but it does remove the graininess from textures, so it's recommended to enable it for at least screenshotting. Mip-mapping is a checkbox option in the performance settings in AW. A less grainy image will help you see objects in the distance better.
- Crop out the GUI from the screenshot, if applicable.
Tricks
- You can use the camera features of AW get otherwise-impossible screenshots. For example if you have a skyscaper, it would be impossible to back up and get the whole building in the picture, because it would slip out of vis range. A solution would be to use a camera with a move command, and use that instead. For example:
Create name cam1, move 200 time=0 wait=9e9
This will create a camera named cam1, and move it 200 meters west, and wait there forever. Then apply this to another object to activate the camera:
Activate camera location=cam1 target=user
When you click this object, the camera will switch to the camera's position, and it will track you, the user. Alternatively you can replace user with the name of one of your named objects.
- If you're feeling creative, and if it's allowed, you can use your favorite graphic editor to further enchance your picture. Examples would be adding a lense flare effect, or reflective water filter. If you do not have an editor, you can download a pretty powerful freeware one at www.gimp.org.
|
|
|
